
7 Tips for Buying Threaded Inserts

A threaded insert can look like a small metal sleeve, yet its choice can determine whether a joint stays secure in wood, plastic, or soft metal. The market context is substantial. Grand View Research estimated the global industrial fasteners market at USD 90.62 billion in 2023, while projecting continued growth through 2030. That figure covers fasteners broadly, not threaded inserts alone, but it signals the scale of fastening decisions across manufacturing.

Details matter. An insert that is too short may strip under repeated loading; one installed too close to an edge can split the surrounding material. Richard T. Barrett, author of NASA’s Fastener Design Manual, provides a useful engineering framework: evaluate fastener choices in relation to the joint, its materials, and its loads. This is a paraphrase of the manual’s design approach, not a direct quotation. The point is practical. A part number cannot replace a careful look at the assembly.

This guide presents 7 Tips for Buying Threaded Inserts, from matching insert type and material to checking installation method, dimensions, and load demands. A caliper, a sample workpiece, and the product datasheet can reveal mismatches before production begins. Small checks help. Still, specifications do not tell the whole story; real-world installation conditions can differ from a clean test setup. Use the tips as a selection framework, then confirm critical choices with the insert manufacturer or a qualified design engineer.
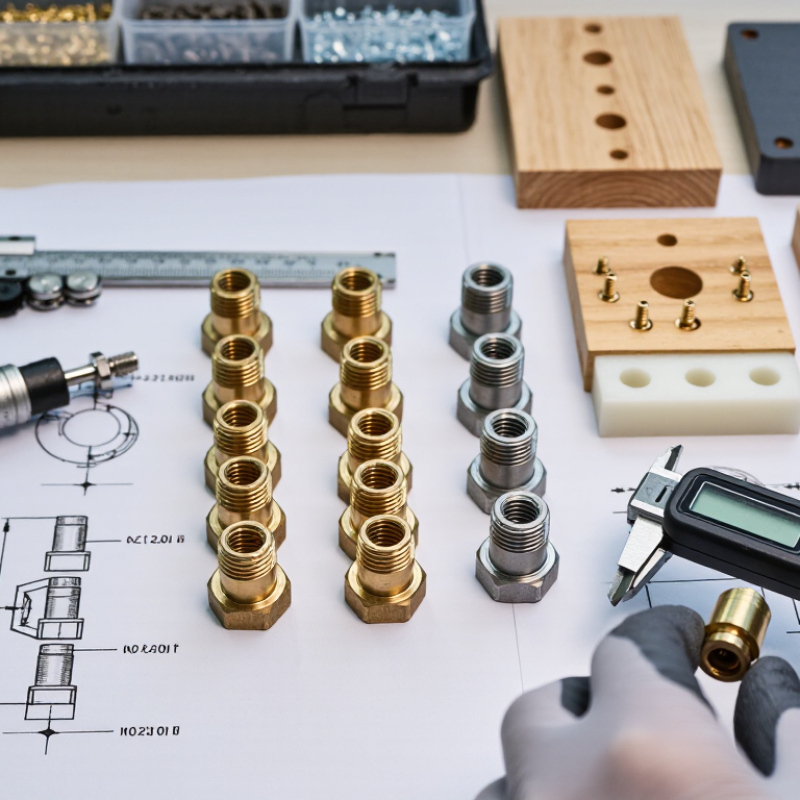
7 Tips for Buying Threaded Inserts

Identify the Insert Type That Fits Your Application

Selecting a threaded insert starts with the material around it, not just the screw size. A heat-set insert can work well in a thermoplastic housing because controlled heat softens the plastic around its knurls. A molded-in insert is better considered during part design, when it can be placed before the material sets. For wood, choose an insert designed to grip without splitting the surrounding fibers. Fit matters. A metal workpiece may call for a wire insert to restore damaged threads or a solid insert for repeated servicing.

Next, consider installation access, expected loads, and how often the joint will be opened. A press-fit style may suit a rigid part, but only when its hole size and material limits match the insert specifications. Check those details; a tight fit is not automatically a strong fit. For vibration or frequent disassembly, look for a design that resists loosening and thread wear. Also consider the tools available: a heat-set insert needs controlled heating, while other types may require a precise tap or installation mandrel. Test a sample. A small trial can reveal plastic cracking, poor alignment, or an insert that spins under torque. Even careful selection can miss a detail, so verify the finished joint under realistic conditions.

Match Insert Material to the Base Material and Environment

Match the insert material to both the part and its surroundings. A steel insert may provide strong threads in an aluminum housing, but moisture can encourage corrosion where the metals meet. In damp or salty conditions, consider a compatible corrosion-resistant material and check whether the base metal needs extra protection. Small details matter. A washer or coating can help, but it does not fix every material mismatch.

The base material also affects how an insert holds. Soft plastics may need a wider, knurled insert that spreads the load; brittle plastics can crack if installation heat or pressure is excessive. For wood, choose an insert designed to grip its fibers, and test it in a scrap piece first. Wood varies. Grain direction, moisture, and density can change the result more than expected. In hot equipment, compare the insert’s temperature limits with the base material’s limits, not just the insert’s strength. A strong insert can still loosen if the surrounding plastic softens.

When conditions are uncertain, test a sample under realistic load and exposure. It takes time, but guessing can cost more. One choice may not suit every section of an assembly.

Choose Thread Size, Length, and Installation Method

Match the insert’s internal thread to the screw, not just to a familiar nominal size. Check both diameter and pitch; a near match can bind, strip, or wobble under load. If drawings are unclear, measure a sample screw with a thread gauge before ordering. Small check. Big difference.

Choose insert length based on the material thickness and the load the joint must carry. The insert should engage enough material to resist pullout, but it should not bottom out or protrude where another part needs to sit flat. For plastic parts, heat-set inserts often work well when the hole and installation temperature follow the insert maker’s specifications. Press-in styles may suit other materials, but they need a correctly sized bore. A loose fit can spin; an overly tight one may crack the part.

Think about access and tools before choosing an installation method. A soldering iron with a controlled tip can help place heat-set inserts straight, while a press offers steadier force for press-fit types. Keep the insert aligned as it enters. It is easy to focus on thread size and overlook the installation step; even a well-matched insert can sit crooked. Test one in a scrap piece first, then inspect the fit and screw engagement.

Check Load Capacity and Compatibility Before Buying

7 Tips for Buying Threaded Inserts

An insert’s load rating only matters when it matches the real joint. Check tensile pull-out, torque-out, and shear capacity separately; one strong result does not prove the others. NASA’s Fastener Design Manual, NASA RP-1228, treats tensile, shear, and combined loading as distinct design cases. Use that distinction when comparing test data. Look for the test material, insert size, installation depth, and failure mode—not just a peak-load number. Small details matter.

Compatibility is just as important. A metal insert in soft wood behaves differently from one installed in a molded plastic part. Check the host material, wall thickness, hole diameter, thread size, and installation method against the insert’s published test conditions. Then consider vibration, temperature, and repeated assembly. A published capacity may fall short if your material is weaker or your hole is oversized. Check the units, too. I would still verify a critical joint with a representative sample; calculations cannot fully capture every installation variation. Choose a margin that reflects the consequence of failure, rather than assuming the highest listed rating is automatically suitable.

Compare Quality, Standards, and Supplier Support

Buying threaded inserts means comparing more than unit price. Confirm the insert type, base material, thread size, and required load before requesting quotes. For helical-coil inserts, ASME B18.29.1 provides a relevant dimensional and performance standard; other insert designs may require different specifications. Ask suppliers to state the standard and revision they follow. Small detail. Big difference. A certificate alone does not show that every lot matches your drawing.

ISO’s 2022 Survey reported 1,265,216 ISO 9001 certificates worldwide. This reflects broad use of quality-management systems, not proof that a particular insert meets your requirements. Request lot traceability and material documentation, then check whether inspection records cover the features that matter, such as thread fit or pull-out strength. Supplier support counts, too. Can they explain installation tooling, recommend a pilot sample, and respond clearly when a test result fails? Try inserts in the actual parent material; a good-looking sample in soft aluminum may behave differently in a thin steel panel. I’d weigh practical evidence above polished sales language, though response speed alone is not a quality test.

7 Tips for Buying Threaded Inserts — Compare Quality, Standards, and Supplier Support
Tip What to Compare Evidence to Request Questions for the Supplier
1. Match the insert to the base material Choose an insert designed for the application, such as wood, thermoplastics, or metal. Installation style and insert geometry affect fit and performance. Product drawing, recommended host-material range, installation instructions, and guidance on hole preparation. Is this insert intended for my substrate and installation method? What pilot-hole size and installation process do you recommend?
2. Check thread and dimensions Confirm the internal thread, pitch, insert length, outside diameter, and any flange or drive features against the assembly design. A dimensioned drawing with tolerances and a clear thread designation, including metric or inch series where applicable. Can you confirm the thread class or tolerance and provide inspection dimensions for the supplied part?
3. Verify material and finish Compare base material and coating or finish for strength, corrosion exposure, temperature, and contact with the surrounding material. Material grade or specification, finish description, and relevant test or material documentation. Confirm that any cited specification applies to the insert. What material and finish are supplied, and are they suitable for the operating environment?
4. Confirm applicable standards Check that thread tolerances, material requirements, and any regulatory declarations match the actual design and market requirements. Not every standard applies to every insert type. A list of claimed standards and the scope of each claim. ISO 965 covers metric screw-thread tolerances; verify its relevance to the specified thread. Which requirements are covered by a recognized standard, and which are controlled by your drawing or purchase specification?
5. Compare performance test evidence Assess pull-out, torque-out, or other relevant performance using the intended substrate, installation method, and test conditions. Test method, substrate description, sample details, and results. Treat performance values as application-dependent rather than universal ratings. Can you provide test data for a setup comparable to my material, hole preparation, and installation process?
6. Review inspection and consistency Compare how dimensions, threads, surface condition, and lots are checked. Consistent process controls help reduce assembly variation. Inspection plan or sample report, lot identification method, and details of how nonconforming product is handled. What checks are performed before shipment, and can supplied lots be traced to inspection records?
7. Evaluate supplier support Consider help with insert selection, samples, installation trials, documentation, lead times, and response to quality issues. Written technical guidance, sample availability, documentation options, and a clear process for handling claims or design changes. Can you support a trial installation and notify us if product specifications or manufacturing details change?